Organise files in Data Vault
Browse governed folders, understand file permissions and use the available view, download, move, copy, delete and upload controls.
data vault.mov · Reviewed against the Buzzmint Engage interface on 16 July 2026. The original full-motion master remains in the private BUZZMINT VIDEOS Drive folder.
- 00:00Review storage
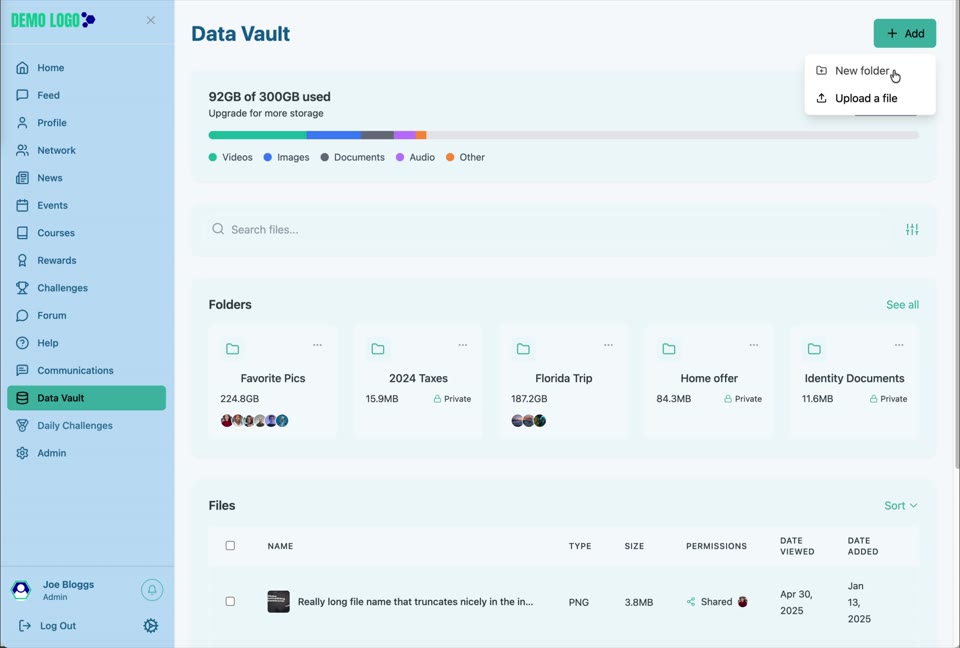
See usage, file-type breakdown, search, folders and recent files.
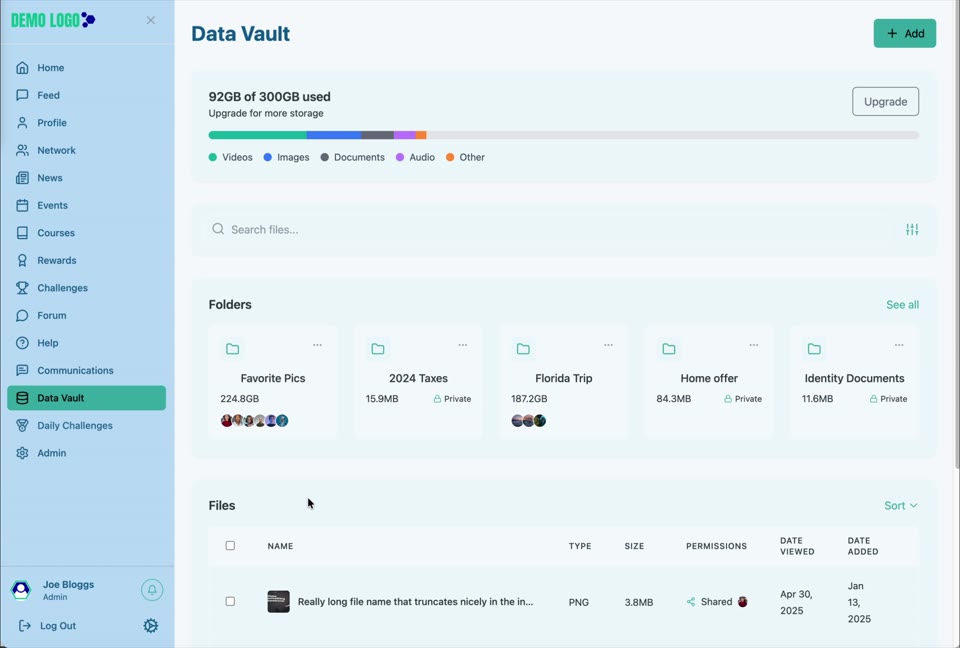
- 00:20Open All folders
Browse every available folder.
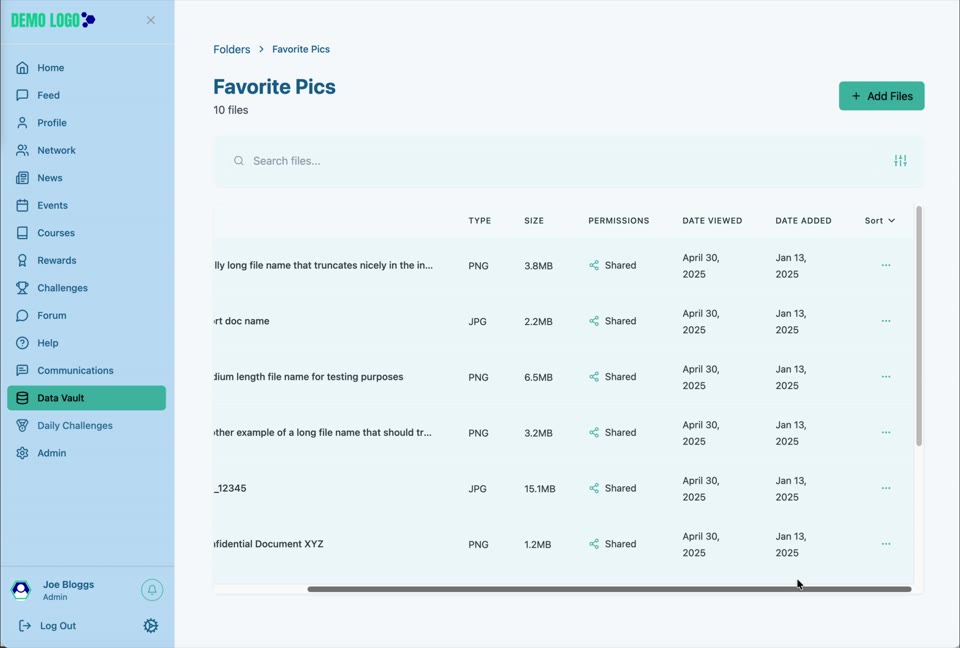
- 00:24Open a folder
Review file name, type, size, permissions and dates.
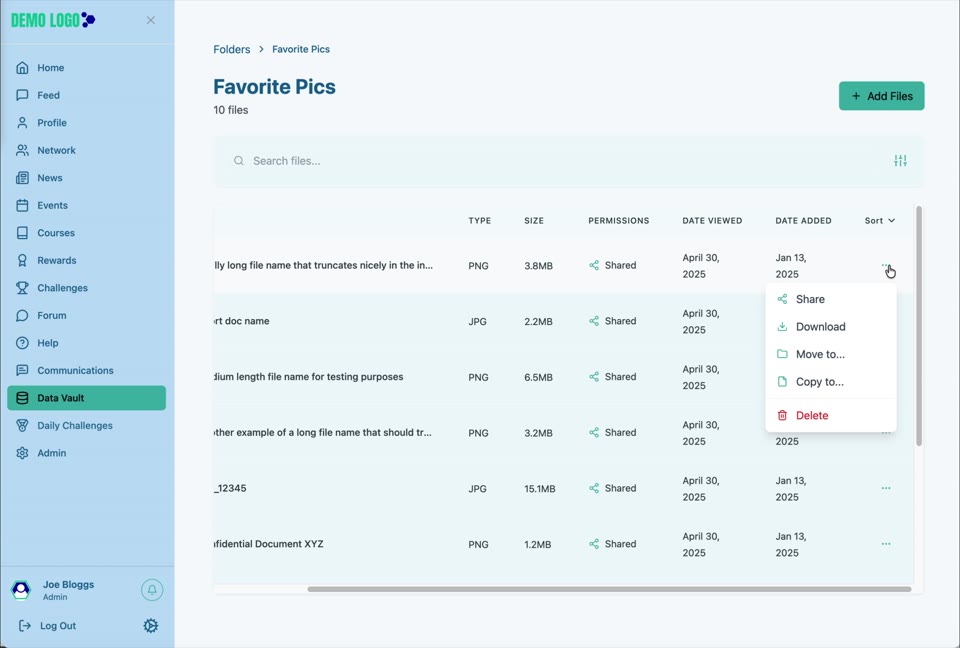
- 00:39Use file actions
Open the item menu for view, download, move, copy or delete.
- 00:47Add content
Choose New folder or Upload a file.
What Data Vault is for
Data Vault is the governed file area inside Buzzmint Engage. It gives members a shared place to organise files, understand access and reuse content in areas such as Communications.
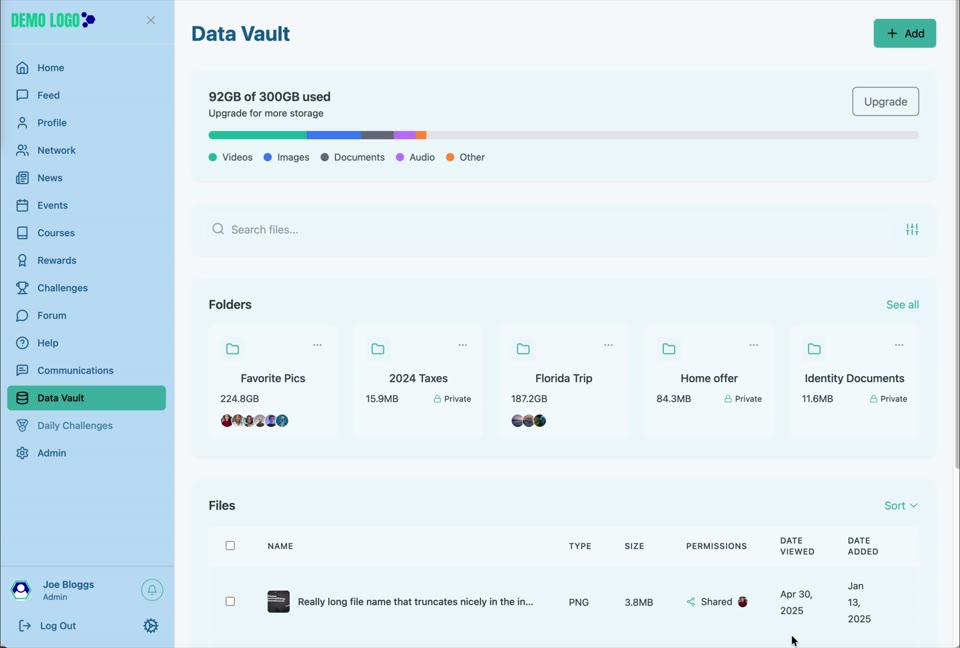
Browse and find content
- Review the storage meter and file-type legend.
- Use Search files to locate matching items.
- Select See all to open the full folder directory.
- Open a folder card to see its files.
- Use Sort or the available table controls to change the file order.
Use file actions
The file menu shown in the walkthrough provides actions such as View, Download, Move to, Copy to and Delete. Use only the actions allowed by your role and the file’s governance requirements.
Add a folder or file
Select Add, then choose New folder or Upload a file. Use a descriptive folder name and place the file in the correct governed location rather than duplicating it across conversations.
Understand permissions
The file table displays permission information such as Shared. Before sending or linking a file, confirm the intended recipients can access it and that the content is suitable for the folder.
Data Vault best practice
- Use stable folder names and agreed ownership.
- Keep one authoritative copy where possible.
- Use descriptive filenames and version information.
- Review access before sharing through Communications.
- Do not use the Vault as a substitute for an approved records policy.
- Remove obsolete access when a project or role changes.
Data Vault checklist
- File is in the correct folder.
- Filename is understandable.
- Permissions match the audience.
- File opens and downloads successfully.
- Move or copy action produced the intended result.
- Deletion is authorised.
- Storage usage remains within the agreed allowance.
Common issues
A file cannot be found
Use search, open All folders and check whether it was moved, renamed or placed in a private folder.
A member cannot open a shared file
Review the file and folder permissions and confirm the member is signed into the correct portal.
Upload is unavailable
Check storage allowance, file size or type and the user’s Data Vault permission.
Hub version 0.3.7 · Last updated 16 July 2026